Grandma collected a GREAT set of mini books from an Advertiser promotion earlier in the year. There are a lot of favourites in there, like Hairy Maclary, and they are a perfect size to hold for little hands. We quickly adopted them as entertainment for long car journeys, as we did a few trips between Melbourne and Adelaide in quick succession. They came in a little bag which we hung over the passenger headrest, so she could help herself. Which was great, in theory. The books often got caught on the internal hem of the bag, so one of us had to stretch our arm around and pull out each one. And, of course, the bag itself soon fell apart, despite being reinforced by my sewing machine a couple of times!
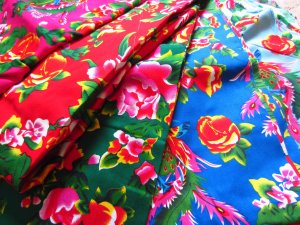
So, since I well and truly had my sewing machine and sewing supplies unpacked from our China shipment (including gorgeous Chinese fabric), I decided it was time to fix this problem myself! I’ve set this up as a kind of tutorial, in case anyone is inspired and would like to follow suit. I, of course, started by scrounging on pinterest, and was particularly inspired by this Grab and Go Traveler. I followed some basic ideas from these, but designed it to suit the things that we play with in the car.
I measured our passenger seat and headrest and these were the measurements that I came up with. I have included a 1.5cm seam allowance for each side, so 3cm has been added to my original measurements.
- Main piece (cut 2) – 36cm x 53cm
- Strap (cut 2) – 36cm x 6cm

Then, I measured the items that I wanted to put in specific pockets. I wanted a pocket for the books, her sunnies, her toy phone and then a general pocket for snacks, clothing and extras. In the end, there was also space for an extra one, so I added another little pocket. I wanted all the pockets to be “seamless”, as in, I didn’t want any seams that could catch things as she pulled things out. So, every piece is doubled, so it can be folded over. W = width, H = height.
- Book pocket (cut 1) – 36cmW x 51cmH
- Phone pocket (cut 1) – 17cmW x 25cmH
- Sunnies pocket (cut 1) – 26cmH x 7cmW
- Large pocket (cut 1) – 41cmW x 45cmH
- Extra pocket (cut 1) – 19cmW x 25cmH

For each pocket I followed the same directions. I “crimped” the pockets to give them depth. For example, for the book pocket, I crimped it until it was only 17cm across, to allow 8cm depth for the pile of books.
For each pocket:
- fold in half, right sides together, and iron
- stitch the sides together (with about a 1cm seam)
- turn inside out (now the right way) and iron
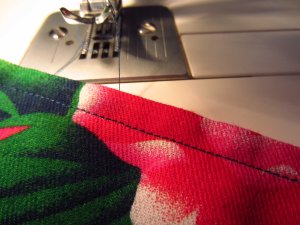
- sew a top seam to look neat
- fold the bottom seam up and iron
- (I also folded in the corners like triangles and tacked them in place to make the sewing easier)

- pin to the right side of your main piece, and crimp to give each pocket depth

- sew in place (with about a 0.5cm seam)
- (I also did a double seam for strength)

Once you have attached all of your pockets, attach the strap at the top using a 1cm seam allowance. Then, sew your second main piece to your first using a 1.5 cm seam allowance, leaving a 10cm gap at the bottom for turning.

Turn it the right way out, hand sew up that gap and it’s done! Yay!

I had some other ideas that could definitely be incorporated:
- a specific pocket for a drink bottle – perhaps with elastic?
- a loop to attach snack cups
- elastic to put around the the whole chair to hold the organiser in place (I was worried with the shape of our seats that this would be uncomfy for the front passenger though)
- like the Grab and Go Traveler, having a way to close it up and transport it would be great for older kids, especially for taking art things around
Have you made something similar? Or do you have other fun car activities to share?


